Difference between revisions of "AVWizard Step by Step"
| Line 1: | Line 1: | ||
| − | + | AV Wizard can be accessed by pressing the Shift key when the LMCE boots up. If you connected a speaker you’ll hear some beeps and then you’ll enter in AV Wizard. | |
| − | + | ||
| − | + | ||
| − | + | ||
| − | + | ||
| − | + | ||
| − | + | ||
| − | + | ||
| − | + | ||
| − | + | 1. This is the first screen of AV Wizard. | |
| + | |||
| + | [[Image:Avw1.jpg]] | ||
| + | |||
| + | Here, you can choose the desired output from your video card to TV or monitor. If you’ll choose VGA, there are many available resolutions and refresh rates. If you have a LCD TV or LCD monitor there is no need to choose a refresh rate. This is helpful only if you have a CRT monitor. | ||
| + | |||
| + | DVI/HDMI means that you can use a special cable from the DVI/HDMI output of your video card to DVI/HDMI input of LCD TV/monitor. | ||
| + | |||
| + | [[Image:300px-DVI Connector.jpg]] | ||
| + | |||
| + | [[Image:Avw2.jpg]] | ||
| + | |||
| + | You have the same range of resolutions like at VGA. Choose one that is suitable for your display device. | ||
| + | |||
| + | '''''Component''''' uses another special cable which is consisting at every extremity of three jacks (red, blue and green). The display and the video card must have these three jacks. | ||
| + | |||
| + | [[Image:180px-Component video RCA.jpg]] | ||
| + | |||
| + | [[Image:Avw3.jpg]] | ||
| + | |||
| + | The resolutions for component are made for using with wide screen monitors and TV’s. Choose the one that is best suited to your display device. | ||
| + | |||
| + | '''''Composite''''' is something like a TV out from your video card to the monitor/LCD TV. It uses another special cable with a yellow jack. Like at component, the video card and the display must have this kind of input connector. | ||
| + | |||
| + | [[Image:300px-Composite.jpg]] | ||
| + | |||
| + | [[Image:Avw4.jpg]] | ||
| + | |||
| + | If you are choosing Composite, you can also choose one TV standard from the list, supported by your display. | ||
| + | |||
| + | '''''S-Video''''' is another way to send the signal from the video card to monitor/TV. The jack for the cable looks like in the image below. | ||
| + | |||
| + | [[Image:300px-SVideoConnector.jpg]] | ||
| + | |||
| + | The screen for setting up S-Video looks like this: | ||
| + | |||
| + | [[Image:Avw5.jpg]] | ||
| + | |||
| + | As you can see in the picture above, you will choose one of the TV standards in the list. | ||
| + | |||
| + | 2. After choosing a resolution, a counter will appear on your screen which will stay 15 seconds. In this time, you can decide if the resolution is good for your monitor or not. If you like it, press Continue. If not, press Back. | ||
| + | |||
| + | [[Image:Avw6.jpg]] | ||
| + | |||
| + | 3. Step 2 of the A/V wizard refers to the graphical aspect of user experience. Here, you have three options: | ||
| + | |||
| + | • Static images, no overlay (lightweight) – It uses only static images and works on nearly all graphics platforms. | ||
| + | |||
| + | • OpenGL with overlay (medium) | ||
| + | |||
| + | • OpenGL with alpha blending (high-end) - In this case your media is always first and foremost, and the media is always full-screen. If you're not watching any media, Pluto downloads the 'most interesting' photos from flickr.com and presents smooth sliding, cross-fading gallery art as your media. | ||
| + | |||
| + | [[Image:Avw8.jpg]] | ||
| + | |||
| + | 4. Step 4 of the wizard will guide you to the adjustment of the image size. The keys + and – from the keyboard will help you to adjust the size of the image. The cursor keys, Up, Down, Left and Right will help you to center the image to the desired position. Once you made the correct setup press OK and go the next screen. | ||
| + | |||
| + | [[Image:Avw9.jpg]] | ||
| + | |||
| + | 5. Step 5 will set up the audio system. Again, you have to look at the sound card to see where is connected the cable which goes to the sound system. If you connected the cable to the correct output you have only to click the choice on the screen. FIIRE will test the sound. If you will hear a melody, then everything is ok, you made the correct setup. | ||
| + | |||
| + | [[Image:Avw10.jpg]] | ||
| + | |||
| + | [[Image:Avw11.jpg]] | ||
| + | |||
| + | 6. The final screen of the AV Wizard will show you the settings that you’ve chosen for the FIIRE system. If agree these setting press Agree, if not, press I do not Agree and you’ll be able to make the settings again. | ||
| + | |||
| + | [[Image:Avw12.jpg]] | ||
Revision as of 13:17, 19 July 2007
AV Wizard can be accessed by pressing the Shift key when the LMCE boots up. If you connected a speaker you’ll hear some beeps and then you’ll enter in AV Wizard.
1. This is the first screen of AV Wizard.
Here, you can choose the desired output from your video card to TV or monitor. If you’ll choose VGA, there are many available resolutions and refresh rates. If you have a LCD TV or LCD monitor there is no need to choose a refresh rate. This is helpful only if you have a CRT monitor.
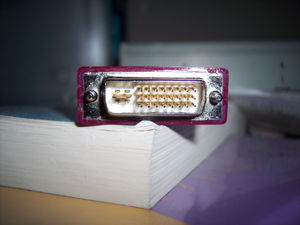
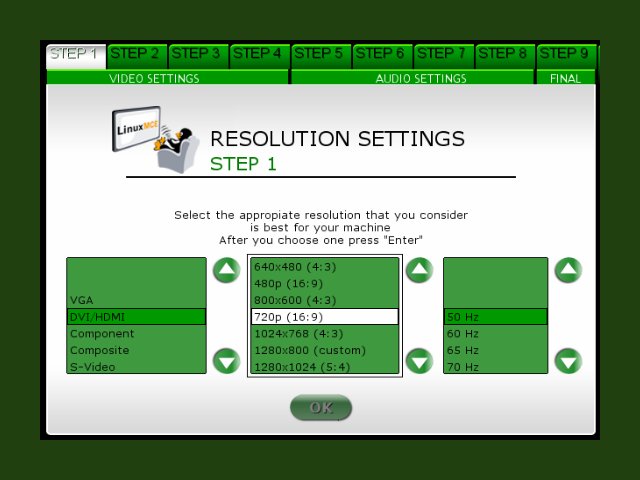
DVI/HDMI means that you can use a special cable from the DVI/HDMI output of your video card to DVI/HDMI input of LCD TV/monitor.
You have the same range of resolutions like at VGA. Choose one that is suitable for your display device.
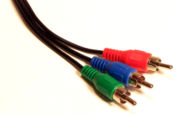
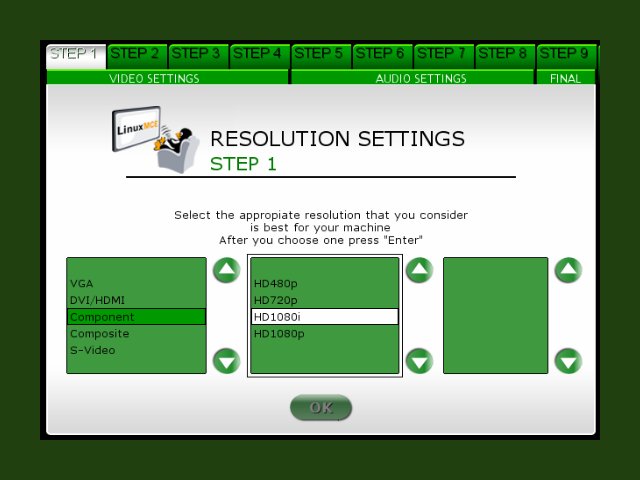
Component uses another special cable which is consisting at every extremity of three jacks (red, blue and green). The display and the video card must have these three jacks.
The resolutions for component are made for using with wide screen monitors and TV’s. Choose the one that is best suited to your display device.
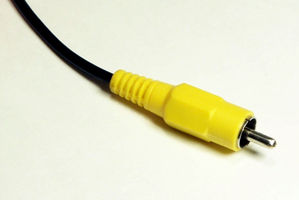
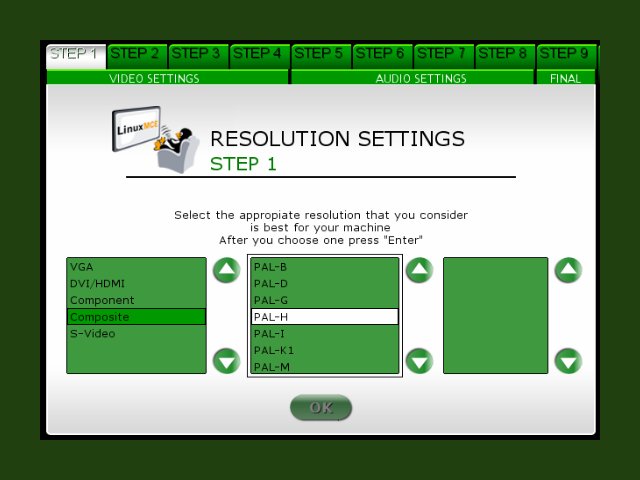
Composite is something like a TV out from your video card to the monitor/LCD TV. It uses another special cable with a yellow jack. Like at component, the video card and the display must have this kind of input connector.
If you are choosing Composite, you can also choose one TV standard from the list, supported by your display.
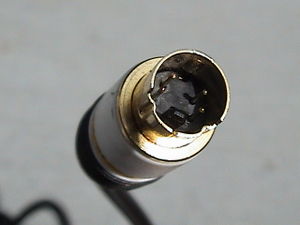
S-Video is another way to send the signal from the video card to monitor/TV. The jack for the cable looks like in the image below.
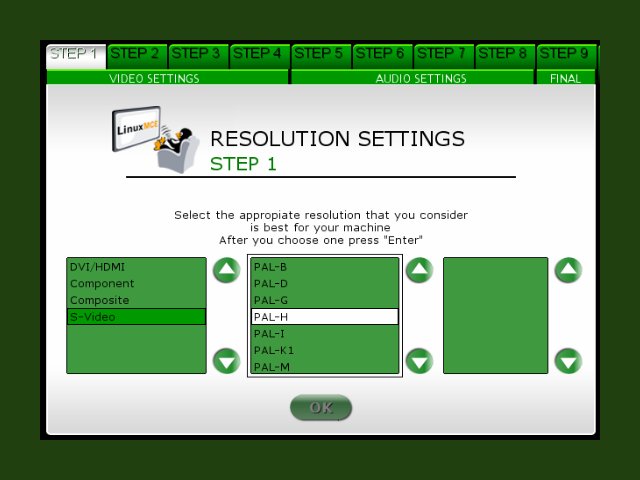
The screen for setting up S-Video looks like this:
As you can see in the picture above, you will choose one of the TV standards in the list.
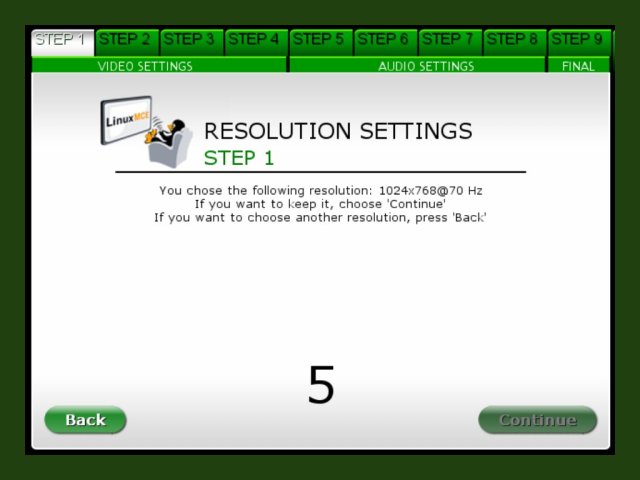
2. After choosing a resolution, a counter will appear on your screen which will stay 15 seconds. In this time, you can decide if the resolution is good for your monitor or not. If you like it, press Continue. If not, press Back.
3. Step 2 of the A/V wizard refers to the graphical aspect of user experience. Here, you have three options:
• Static images, no overlay (lightweight) – It uses only static images and works on nearly all graphics platforms.
• OpenGL with overlay (medium)
• OpenGL with alpha blending (high-end) - In this case your media is always first and foremost, and the media is always full-screen. If you're not watching any media, Pluto downloads the 'most interesting' photos from flickr.com and presents smooth sliding, cross-fading gallery art as your media.
4. Step 4 of the wizard will guide you to the adjustment of the image size. The keys + and – from the keyboard will help you to adjust the size of the image. The cursor keys, Up, Down, Left and Right will help you to center the image to the desired position. Once you made the correct setup press OK and go the next screen.
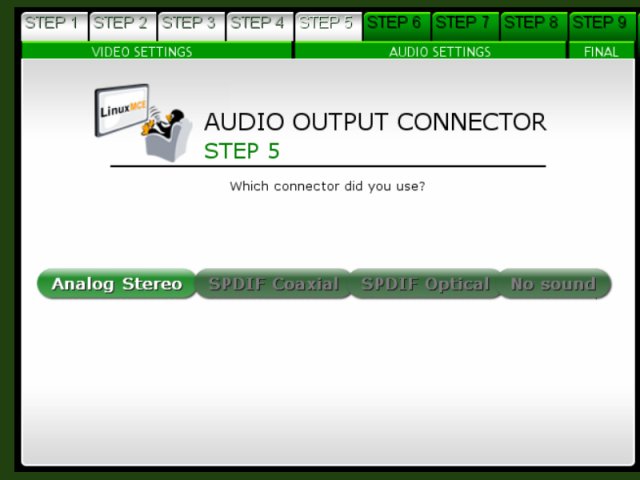
5. Step 5 will set up the audio system. Again, you have to look at the sound card to see where is connected the cable which goes to the sound system. If you connected the cable to the correct output you have only to click the choice on the screen. FIIRE will test the sound. If you will hear a melody, then everything is ok, you made the correct setup.
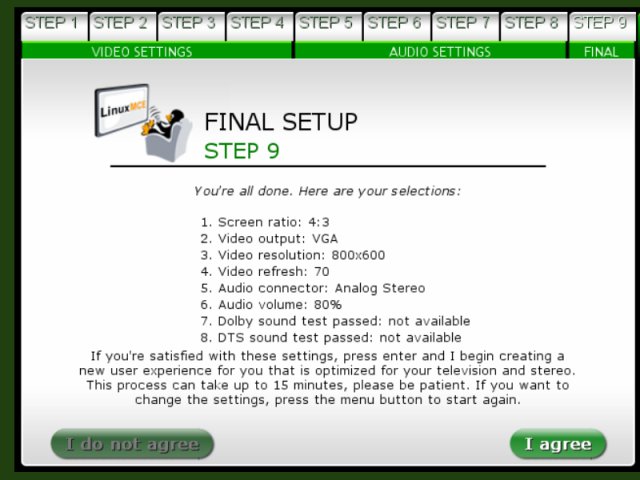
6. The final screen of the AV Wizard will show you the settings that you’ve chosen for the FIIRE system. If agree these setting press Agree, if not, press I do not Agree and you’ll be able to make the settings again.

