Difference between revisions of "LinuxMCE 710 DVD Installation"
From LinuxMCE
| Line 21: | Line 21: | ||
6.To start the installation, choose the first option. | 6.To start the installation, choose the first option. | ||
| − | 7.You will be asked to select the drive for install | + | 7.You will be asked to select the drive for install. Press 1 for the first hard-drive, 2 for the second, etc. |
[[Image:which_drive.jpg]] | [[Image:which_drive.jpg]] | ||
| Line 28: | Line 28: | ||
[[Image:Continue.jpg]] | [[Image:Continue.jpg]] | ||
| − | 9. | + | [[Image:Continue2.jpg]] |
| + | |||
| + | 9.When the installation is finished, you will be asked to remove the disc from the drive, close the tray and press 'enter' | ||
| + | |||
| + | [[Image:Finish.jpg]] | ||
Revision as of 22:28, 30 July 2007
1.Download the LMCE DVD ISO Image from <link>.
2.Burn it with your favorite dvd writing software.
3.Enter your LMCE PC BIOS (by pressing DEL, F2 key at boot-up), and select to first boot from CD/DVD.
4.Insert the LMCE DVD in the driver and save your bios settings.
5.If your PC will boot from the LMCE DVD you'll see the following boot menu:
5.1.Install Linux Media Center - will install LMCE on your hard drive;
5.2.Recovery - allows you to open a console and diagnose your un-bootable system or request support from technical department;
5.3.Memory test - test your PC volatile memory(SDRAM, DDRAM);
5.4.Boot from first hard disk - boot your pc from the first hard drive, like a normal boot.
6.To start the installation, choose the first option.
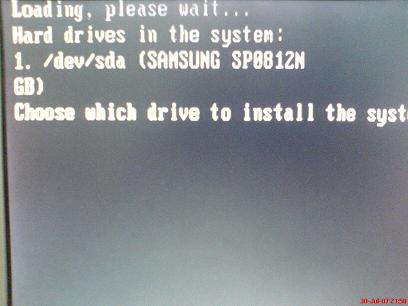
7.You will be asked to select the drive for install. Press 1 for the first hard-drive, 2 for the second, etc.
8.The installation continues
9.When the installation is finished, you will be asked to remove the disc from the drive, close the tray and press 'enter'


