Linksys WRT54G
| Version | Status | Date Updated | Updated By |
|---|---|---|---|
| 710 | Unknown | N/A | N/A |
| 810 | Unknown | N/A | N/A |
| 1004 | Unknown | N/A | N/A |
| 1204 | Unknown | N/A | N/A |
| 1404 | Unknown | N/A | N/A |
| Usage Information | |||
Overview
Linksys WRT54G (and variants WRT54GS, WRT54GL, and WRTSL54GS) is a Wi-Fi capable residential gateway from Linksys. The device is capable of sharing Internet connections among several computers via 802.3 Ethernet and 802.11b/g wireless data links.
The WRT54G is notable for being the first consumer-level network device that had its firmware source code released to satisfy the obligations of the GNU GPL. This allows programmers to modify the firmware to change or add functionality to the device. Several third-party firmware projects provide the public with enhanced firmware for the WRT54G
The original WRT54G was first released in December 2002. It comes with a 4+1 port network switch (the Internet/WAN port is also in the same internal network switch, but on a different VLAN). The devices have two removable antennas connected through Reverse Polarity TNC connectors. The WRT54GC router is an exception and has an internal antenna with optional external antenna. As a cost-cutting measure, the design of the latest version of the WRT54G no longer has detachable antennas or TNC connectors. Instead, version 8 routers simply route thin wires into antenna 'shells' eliminating the connector. As a result, Linksys HGA7T and similar external antennas are no longer compatible with this model.
How to Configure this Device as a Switch
Do these steps in order:
1. Connect directly to the router and log on (default IP is 192.168.1.1, leave the username blank and type 'admin' in the password field)
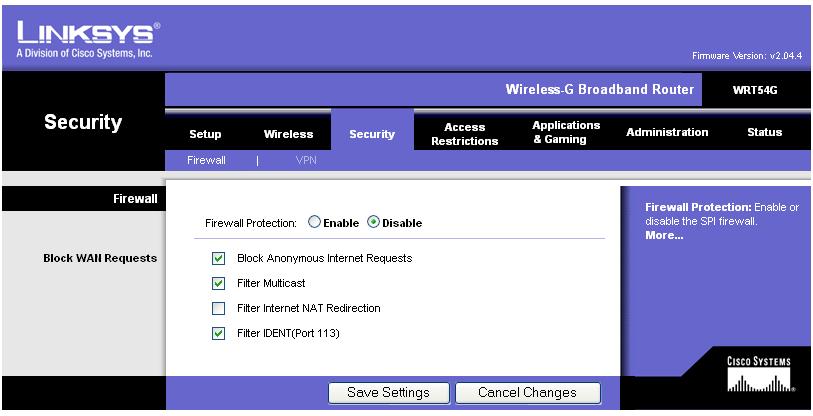
2. Go to the Security page and disable the firewall (disable all items in the 'block WAN requests' section) - hit the save settings button

3. Go to 'Setup' page and change the local IP adress to something within the Core's Range. The Default range for a LinuxMCE Core is 192.168.80.2 to 192.168.90.128 for Pluto Devices and 192.168.80.129 to 192.168.80.254 for non-pluto devices. set the router's local IP to be in the non-Pluto range - mine is 192.168.80.130. - Again Save Settings

4. you will now have to re-logon to the new IP address (192.168.80.130 for me).
5. On the setup page again, below the local IP address, Disable the DHCP server - Save Settings. (See above)
Reconnect the device to the Eth1 port on the core (to a LAN port not the WAN port) and power cycle it and you are all set.