Difference between revisions of "ZWave"
(→Implementation) |
|||
| (137 intermediate revisions by 26 users not shown) | |||
| Line 1: | Line 1: | ||
| − | + | {{Versioninfo|810Status=Working|810UpdatedDate=12th May 2010|810UpdatedBy=sambuca}} | |
| + | {| align="right" | ||
| + | | __TOC__ | ||
| + | |} | ||
| + | [[Category: Automation]] | ||
| + | [[Category: RF Control]] | ||
| + | [[Category: ZWave]] | ||
| + | [[Category: Programmer's Guide]] | ||
| + | [[Category: Documentation]] | ||
| − | + | Z-Wave™ is a wireless RF-based communications technology designed for residential and light commercial control and status reading applications such as meter reading, lighting and appliance control, HVAC, access control, intruder and fire detection. | |
| − | == | + | == Overview == |
| + | The support from LinuxMCE system is represented by an executable '''ZWave''' (it's placed in /usr/pluto/bin) which is the device implementation and a '''DeviceTemplate (1754)''' which is used to create LinuxMCE Devices for ZWave. | ||
| + | There are high speed (4x 40kbps) and standard speed Z-Wave devices. | ||
| − | + | For information about what hardware to get look at [[Z-Wave Getting Started]], or check out the [[:Category:ZWave|Z-Wave Wiki Category]]. | |
| − | + | == How to install and use ZWave == | |
| + | === Automatic installation - Lighting Wizard === | ||
| + | The [[Lighting Wizard]] allows you to easily integrate LinuxMCE into your Z-Wave network. It is started after you plug in the Z-Wave dongle. Just follow the onscreen instructions. However the Lighting Wizard does not support SUC/SIS mode (see below) and because of this is now not the best way to include ZWave devices into your ZWave network. If you have a ZWave USB interface and an Inclusion Controller that supports SUC/SIS mode then this is the recommended configuration to use. | ||
| − | + | === SUC/SIS Mode (recommended) === | |
| − | + | In SUC/SIS mode, LMCE adds your devices automatically as you include them into the Z-Wave network. Inclusion can be done using an inclusion remote or the "Add Node" command in LMCE (this option is really only successful in smaller test installations or possibly in smaller apartments for example). LMCE will assign new Node ids to the included devices and will add them in the Device tree under your ZWave USB interface. The following procedure requires that your ZWave USB interface and your Inclusion Device are compatible with SUC/SIS (**See the note at the bottom of this section); | |
| − | + | ||
| − | + | ||
| − | + | ||
| − | + | ||
| − | + | ||
| − | + | ||
| − | + | ||
| − | + | ||
| − | + | ||
| − | + | #To use the SUC/SIS mode, send a "Reset" command to the ZWave USB interface. | |
| + | ##For LinuxMCE systems 1004 and below: | ||
| + | ###In the web admin, go to Advanced -> Configuration -> Devices, find the ZWave device in the tree, select it, click "Send Command To Device" in the right pane. | ||
| + | ###Select "Reset" and click Send Message. (Reset will remove all devices from you Z-Wave network). | ||
| + | ##For LinuxMCE systems 1204 and above (which uses the Open Zwave library's): | ||
| + | ###In the web admin, go to Advanced -> Configuration -> Devices, find the ZWave device in the tree, select it, click "Send Command To Device" in the right pane. | ||
| + | ###Select "Reset", in the "Data" field enter "ResetController" and click Send Message. (Reset will remove all devices from you Z-Wave network). | ||
| + | #Next do a Reload Router (**This reload is essential**). | ||
| + | #When using SUC/SIS mode you must add an Inclusion Controller as the 2nd device in your ZWave network (the first device being the ZWave USB interface itself). An Inclusion Controller is the device you use to include ZWave devices into the ZWave network - this might be your ZWave remote control or possibly a wireless wall switch as these can often do double duty as an Inclusion Controller. You can add additional Inclusion Controllers or indeed any other ZWave devices at any time in the future as needed, and they will be added to your Device Tree automatically for you - this is the unique power of SUC/SIS. | ||
| + | ##'''If using a Tricklestar Remote:''' | ||
| + | ###First select 'Add node' from the 'Send to this device the command' drop-down menu and click Send Message (there is no need to fill in any values in this screen). | ||
| + | ###Next put the remote in configuration mode, then press and hold up until the LED flashes green, then press up four times. The LED will begin flashing green. Once added, the remote LED should start flashing faster then go steady green indicating success. If it goes red then reset the remote (hold up til green, then hold up 10 seconds until 3 color LED), and redo step 1-2. | ||
| + | ##'''If not using a Tricklestar remote:''' | ||
| + | ###Select 'Add node' from the 'Send to this device the command' drop-down menu and click Send Message (there is no need to fill in any values in this screen). | ||
| + | ###Next bring your Inclusion Controller close to your Core's/MD's ZWave USB interface and click once on its button or paddle (if a Wireless light switch) to include it into the ZWave Network. Your device should now indicate a successful inclusion if not repeat the last step. | ||
| + | ###You should see a ZWave device added message momentarily appear in the top left hand corner of your Orbiters display | ||
| + | ###Some users have reported the need to do a reload at this step. However this should not normally be required if you saw the ZWave added message from the previous step. | ||
| + | #If your Inclusion Remote indicated a successful inclusion you are now ready to start including light switches and other devices using the device you added as an Inclusion Controller (ie your ZWave remote or a wireless Light Switch) - and '''not''' the 'Add Node' command in Web Admin. | ||
| + | #Place your inclusion controller device into Inclusion Mode (consult the devices manual for the details of how to include devices using it). | ||
| + | #Now while holding it close to the device you want to include press any button on the front of that device (usually one of the paddles on a light switch for example). | ||
| + | #Wait for the successful inclusion indication on the device you are including and if you have an Orbiter or Web Orbiter nearby you should also see a brief announcement that device was added successfully. A few seconds later a router reload screen will pop up on your Orbiter's displays. (**If you'r adding several devices to your ZWave network then you can continue to add them and then do a single reload after adding the last device - this is an important reload so dont forget this step.**) | ||
| + | #Now you can move to the next device and include it. | ||
| + | #Keep doing this until all of your devices are included. With SUC/SIS there is no need to include all of your ZWave devices in one hit. You can stop and continue another time without any issues. So adding some more devices months into the future is simple and easy to do. | ||
| + | #After including your last ZWave device don't forget to do a reload router | ||
| + | #Check in Web Admin's Wizard->Devices->Lights page or click on 'Show Devices Tree' at the bottom of the left hand frame to make sure all of your included devices are present.(**if not do a reload router and wait a about 60 secs then check again). | ||
| + | * Note: When including devices using SUC/SIS mode always start by including the devices that are closest to where the Core's ZWave USB interface is located and finish with the device that is furthest away. This enables the inclusion process to utilise the ZWave mesh network to communicate with the Core's ZWave USB interface. | ||
| − | + | * Not all ZWave interfaces support SIS mode. See the page of the individual interface to check, here is a list of interfaces [[Z-Wave Getting Started#Interface]]. | |
| − | === | + | ==== How to add multi-paddle Multi-level Light Switches/Dimmers ==== |
| − | + | ||
| − | + | Some newer ZWave multi-paddle Light Switches & dimmers are built around the multi-level command classes present in the latest Zensys ZWave API ([[MK Honeywell Astral]] products are an example of this new type of device). These devices will function perfectly with the SUC/SIS mode but will need a small amount of manual configuration for paddles 2 & above. These devices typically will not have their 2nd paddle added automatically when they are included into your ZWave network ie only the 1st paddle will appear in your device tree. In time this limitation will be removed from the ZWave driver but for now please follow the simple manual procedure described below for adding the 2nd paddle to your device tree; | |
| − | + | ||
| − | + | ||
| − | + | ||
| − | + | ||
| − | + | ||
| − | + | ||
| − | + | ||
| − | + | ||
| − | + | ||
| − | + | ||
| − | + | ||
| − | + | ||
| − | + | #After including your multi-paddle light switch or dimmer (see the SUC/SIS section above) make a note of its ZWave Node ID. | |
| − | + | ##To do this look in Web Admin's Wizard->Devices->Lights page to get the Node ID - see the value listed for each light in the 'Port/Channel Number' field. | |
| − | + | #Now we need to add a new device for the right hand paddle; | |
| − | + | ##'''If your adding a right hand paddle for a Light Switch:''' | |
| − | + | ###Click on 'Show Devices Tree' (at the bottom of the left hand frame) and click on the 'ZWave' item under the 'Core' in the tree. | |
| − | + | ###In the right hand pane you should now see the 'Advanced' screen for your ZWave interface | |
| − | + | ###Now click on 'Create Child Device' | |
| + | ###You should now see the 'Add Child Device' screen and should click on the 'Pick device template' button. | ||
| + | ###The 'Pick device template' window should now be visible. | ||
| + | ###Click on the 'Device Template' drop down and select 'Light Switch (on/off)' from the list. You should now see the number '37' appear to the right of the drop down list (this is the templates ID). | ||
| + | ###Now click on 'Pick Device Template' | ||
| + | ###A new 'Light Switch (on/off)' device will now be added to the end of the list of child devices under your ZWave interface in the devices tree. | ||
| + | ##'''If your adding a right hand paddle for a Dimmer:''' | ||
| + | ###Click on 'Show Devices Tree' (at the bottom of the left hand frame) and click on the 'ZWave' item under the 'Core' in the tree. | ||
| + | ###In the right hand pane you should now see the 'Advanced' screen for your ZWave interface | ||
| + | ###Now click on 'Create Child Device' | ||
| + | ###You should now see the 'Add Child Device' screen and should click on the 'Pick device template' button. | ||
| + | ###The 'Pick device template' window should now be visible. | ||
| + | ###Click on the 'Device Template' drop down and select 'Light Switch (Dimmable)' from the list. You should now see the number '38' appear to the right of the drop down list (this is the templates ID). | ||
| + | ###Now click on 'Pick Device Template' | ||
| + | ###A new 'Light Switch (on/off)' device will now be added to the end of the list of child devices under your ZWave interface in the devices tree. | ||
| + | #You should now have a new Light Switch or Dimmer device in your devices tree - click on its entry in the tree. | ||
| + | #In the right hand pane you will now see the Advanced info for your new device - we need to modify some values for this new device; | ||
| + | ##Modify the 'Description' field so that it describes clearly what this device is ie something like 'Master Bed Dimmer (paddle-2)' (this text is displayed in the Devices Tree) | ||
| + | ##Now select a 'Room' from the Room drop down and tick any Entertainment Areas this Light should be added too. | ||
| + | ##Next scroll down to the 'Device Data' section at the bottom of the screen and choose a floor Plan icon from the 'PK_FloorplanObjectType' drop down (this determines what icon will be displayed in the lighting floor plan for this specific light). | ||
| + | ##Finally you need to set the 'Port/Channel Number' field to link this device with light switch/dimmer it is assigned to. Add the Node ID you made a note of in Step 1 to the field followed by a '/' and a number. If this is paddle-2 then the number after the '/' would be '2'. So if the Node ID was '16' you should now have the string '16/2' in the field. If you multi-paddle light/dimmer has more than two paddles then increment the value by '1' for each additional paddle. | ||
| + | ##The final step is to click 'Save' to save the changes you have made to the device. | ||
| + | #Now go to the Wizards->Devices->Lights page and test your new light switch/dimmer paddle - use the 'ON', 'OFF' & '50%' buttons. | ||
| − | + | === Alternate setup of [[Tricklestar Remote]] (not recommended) === | |
| − | + | ||
| − | + | ||
| − | + | ||
| − | + | ||
| − | + | === Manual setup / Download configuration === | |
| − | + | Once you have successfully installed the ZWave USB controller and it is seen on LinuxMCE ([[media:zwave_homepro_interface.png]]), you can proceed by populating the ZWave network information to LinuxMCE. | |
| − | + | ||
| − | + | ||
| + | # Add your ZWave devices to your master ZWave master remote controller (like [[ZTH200]]) | ||
| + | #* Once the devices are added to remote and verified they are working (you can control them with your remote controller), you need to copy the ZWave network information to LinuxMCE. | ||
| + | # Go to LinuxMCE admin page (<nowiki>"http://dcerouter/lmce-admin/"</nowiki>), then choose "Wizard -> Devices -> Interfaces -> [your ZWave controller] -> Advanced". | ||
| + | ## On the device page select "Send command to device". | ||
| + | ## Select command "Download Configuration" and choose "Send Message". | ||
| + | ##* Leave the data and file fields as blank | ||
| + | # Now LinuxMCE is waiting for the ZWave information and you should send a copy of the ZWave network with your master remote controller to LinuxMCE. | ||
| + | #* If you are using HomePro remote controller this is done by selecting: "Setup -> Copy Remote Ctrl. -> Send Information -> Identical Copy". Once you have done that, the remote will show "Sending information..." and after successful sending it will return to clock screen (this shouldn't take more than couple of minutes). | ||
| + | #* You can monitor the process by watching the Zwave log file on LinuxMCE (usually "/var/log/pluto/*ZWave.log"). Unfortunately the admin page doesn't give much information of what is being done and is everything going smoothly. If the process is successfully, you should see the LinuxMCE communicating with the USB controller | ||
| + | #* Make sure the sending remote controller is near enough the USB receiver, otherwise nothing will happen. | ||
| + | # Go to device tree (Show devices tree) and you should see ([[Media:zwave_devices_tree.png]]) the newly added ZWave modules/devices on the tree under "CORE -> ZWave". | ||
| + | You should do quick reload (Wizard -> Restart -> Quick Reload Router) in order to use the newly added devices with LinuxMCE. Once you have done that you should be able to control (like switching on/off) the devices under the Light ([[Media:zwave_lights.png]]). | ||
| − | == | + | == Setting associations == |
| − | + | If you use SIS mode, associations will be set automatically, so that LMCE is always associated with each new device. This allows LMCE to receive messages when a device changes state. | |
| − | If | + | |
| − | + | ||
| − | + | ||
| − | + | ||
| − | + | ||
| − | + | ||
| − | + | ||
| − | + | ||
| − | + | ||
| − | + | ||
| − | + | ||
| − | + | ||
| − | + | ||
| − | + | The web interface allows you to create associations between devices (I believe this requires SIS mode, not sure). | |
| + | Click "Show device tree" then navigate to your z-wave controller (under CORE) and select "Send command to device". A popup window will show and you can choose the "Set Association" command. | ||
| + | Enter three parameters: | ||
| + | * the zwave NodeID of the source device, the one that will send the command | ||
| + | * the group in the source device that will trigger the send (typically the button number on a multi-paddle switch) | ||
| + | * the NodeID(s) device(s) | ||
| + | Example: 5 / 2 / 7,8 would cause devices 7 and 8 to turn on when you press button 2 of device 5 | ||
| + | == Tweak advanced ZWave settings == | ||
| + | If you want to tweak some specific settings of your ZWave devices then read [[Tweak_advanced_ZWave_settings|this article]]. | ||
| − | == | + | == Update node information == |
| + | You can request a manual update of the node information (command classes). To do this open the advanced page of the main ZWave device and send command to device. Send a "Resync node" command with the node id of the node you want to update the information from. | ||
| − | + | It should normally not be necessary to do this, as the node information is updated at the first reload after it was added. However, it can be useful if for some reason the node information was not correctly set or if you have replaced a node which may have other command classes. | |
| − | + | ||
| − | + | = Implementation = | |
| + | == OpenZWave version == | ||
| + | This in included in 1204 and onwards. | ||
| + | The source code is available in LinuxMCE's SVN repository: http://svn.linuxmce.org/svn/branches/LinuxMCE-0810/src/ZWave-OZW. | ||
| − | == | + | == Open version == |
| + | The new open Z-Wave driver is included in the 0810 and 1004 release. | ||
| + | The source code is available in LinuxMCE's SVN repository: http://svn.linuxmce.org/svn/branches/LinuxMCE-0810/src/ZWave. | ||
| − | + | == To know == | |
| − | + | If after a new install you have problems with your current zwave network, it may be useful to make a complete reset of this network and complete it with a reset of all the devices. | |
| − | + | The reset of devices can be done with an exclusion command (find those in your devices books). | |
| − | + | ||
| − | + | ||
| − | + | ||
| − | + | ||
| − | + | ||
| − | + | ||
| − | == | + | == Z-Wave API documentation == |
| − | + | [[ZWave API]] | |
| − | + | ||
| − | + | ||
| − | + | ||
| − | + | ||
| − | + | ||
| − | + | ||
| − | + | ||
| − | + | ||
| − | + | ||
Latest revision as of 22:25, 25 April 2014
| Version | Status | Date Updated | Updated By |
|---|---|---|---|
| 710 | Unknown | N/A | N/A |
| 810 | Working | 12th May 2010 | sambuca |
| 1004 | Unknown | N/A | N/A |
| 1204 | Unknown | N/A | N/A |
| 1404 | Unknown | N/A | N/A |
| Usage Information | |||
Z-Wave™ is a wireless RF-based communications technology designed for residential and light commercial control and status reading applications such as meter reading, lighting and appliance control, HVAC, access control, intruder and fire detection.
Overview
The support from LinuxMCE system is represented by an executable ZWave (it's placed in /usr/pluto/bin) which is the device implementation and a DeviceTemplate (1754) which is used to create LinuxMCE Devices for ZWave. There are high speed (4x 40kbps) and standard speed Z-Wave devices.
For information about what hardware to get look at Z-Wave Getting Started, or check out the Z-Wave Wiki Category.
How to install and use ZWave
Automatic installation - Lighting Wizard
The Lighting Wizard allows you to easily integrate LinuxMCE into your Z-Wave network. It is started after you plug in the Z-Wave dongle. Just follow the onscreen instructions. However the Lighting Wizard does not support SUC/SIS mode (see below) and because of this is now not the best way to include ZWave devices into your ZWave network. If you have a ZWave USB interface and an Inclusion Controller that supports SUC/SIS mode then this is the recommended configuration to use.
SUC/SIS Mode (recommended)
In SUC/SIS mode, LMCE adds your devices automatically as you include them into the Z-Wave network. Inclusion can be done using an inclusion remote or the "Add Node" command in LMCE (this option is really only successful in smaller test installations or possibly in smaller apartments for example). LMCE will assign new Node ids to the included devices and will add them in the Device tree under your ZWave USB interface. The following procedure requires that your ZWave USB interface and your Inclusion Device are compatible with SUC/SIS (**See the note at the bottom of this section);
- To use the SUC/SIS mode, send a "Reset" command to the ZWave USB interface.
- For LinuxMCE systems 1004 and below:
- In the web admin, go to Advanced -> Configuration -> Devices, find the ZWave device in the tree, select it, click "Send Command To Device" in the right pane.
- Select "Reset" and click Send Message. (Reset will remove all devices from you Z-Wave network).
- For LinuxMCE systems 1204 and above (which uses the Open Zwave library's):
- In the web admin, go to Advanced -> Configuration -> Devices, find the ZWave device in the tree, select it, click "Send Command To Device" in the right pane.
- Select "Reset", in the "Data" field enter "ResetController" and click Send Message. (Reset will remove all devices from you Z-Wave network).
- For LinuxMCE systems 1004 and below:
- Next do a Reload Router (**This reload is essential**).
- When using SUC/SIS mode you must add an Inclusion Controller as the 2nd device in your ZWave network (the first device being the ZWave USB interface itself). An Inclusion Controller is the device you use to include ZWave devices into the ZWave network - this might be your ZWave remote control or possibly a wireless wall switch as these can often do double duty as an Inclusion Controller. You can add additional Inclusion Controllers or indeed any other ZWave devices at any time in the future as needed, and they will be added to your Device Tree automatically for you - this is the unique power of SUC/SIS.
- If using a Tricklestar Remote:
- First select 'Add node' from the 'Send to this device the command' drop-down menu and click Send Message (there is no need to fill in any values in this screen).
- Next put the remote in configuration mode, then press and hold up until the LED flashes green, then press up four times. The LED will begin flashing green. Once added, the remote LED should start flashing faster then go steady green indicating success. If it goes red then reset the remote (hold up til green, then hold up 10 seconds until 3 color LED), and redo step 1-2.
- If not using a Tricklestar remote:
- Select 'Add node' from the 'Send to this device the command' drop-down menu and click Send Message (there is no need to fill in any values in this screen).
- Next bring your Inclusion Controller close to your Core's/MD's ZWave USB interface and click once on its button or paddle (if a Wireless light switch) to include it into the ZWave Network. Your device should now indicate a successful inclusion if not repeat the last step.
- You should see a ZWave device added message momentarily appear in the top left hand corner of your Orbiters display
- Some users have reported the need to do a reload at this step. However this should not normally be required if you saw the ZWave added message from the previous step.
- If using a Tricklestar Remote:
- If your Inclusion Remote indicated a successful inclusion you are now ready to start including light switches and other devices using the device you added as an Inclusion Controller (ie your ZWave remote or a wireless Light Switch) - and not the 'Add Node' command in Web Admin.
- Place your inclusion controller device into Inclusion Mode (consult the devices manual for the details of how to include devices using it).
- Now while holding it close to the device you want to include press any button on the front of that device (usually one of the paddles on a light switch for example).
- Wait for the successful inclusion indication on the device you are including and if you have an Orbiter or Web Orbiter nearby you should also see a brief announcement that device was added successfully. A few seconds later a router reload screen will pop up on your Orbiter's displays. (**If you'r adding several devices to your ZWave network then you can continue to add them and then do a single reload after adding the last device - this is an important reload so dont forget this step.**)
- Now you can move to the next device and include it.
- Keep doing this until all of your devices are included. With SUC/SIS there is no need to include all of your ZWave devices in one hit. You can stop and continue another time without any issues. So adding some more devices months into the future is simple and easy to do.
- After including your last ZWave device don't forget to do a reload router
- Check in Web Admin's Wizard->Devices->Lights page or click on 'Show Devices Tree' at the bottom of the left hand frame to make sure all of your included devices are present.(**if not do a reload router and wait a about 60 secs then check again).
- Note: When including devices using SUC/SIS mode always start by including the devices that are closest to where the Core's ZWave USB interface is located and finish with the device that is furthest away. This enables the inclusion process to utilise the ZWave mesh network to communicate with the Core's ZWave USB interface.
- Not all ZWave interfaces support SIS mode. See the page of the individual interface to check, here is a list of interfaces Z-Wave Getting Started#Interface.
How to add multi-paddle Multi-level Light Switches/Dimmers
Some newer ZWave multi-paddle Light Switches & dimmers are built around the multi-level command classes present in the latest Zensys ZWave API (MK Honeywell Astral products are an example of this new type of device). These devices will function perfectly with the SUC/SIS mode but will need a small amount of manual configuration for paddles 2 & above. These devices typically will not have their 2nd paddle added automatically when they are included into your ZWave network ie only the 1st paddle will appear in your device tree. In time this limitation will be removed from the ZWave driver but for now please follow the simple manual procedure described below for adding the 2nd paddle to your device tree;
- After including your multi-paddle light switch or dimmer (see the SUC/SIS section above) make a note of its ZWave Node ID.
- To do this look in Web Admin's Wizard->Devices->Lights page to get the Node ID - see the value listed for each light in the 'Port/Channel Number' field.
- Now we need to add a new device for the right hand paddle;
- If your adding a right hand paddle for a Light Switch:
- Click on 'Show Devices Tree' (at the bottom of the left hand frame) and click on the 'ZWave' item under the 'Core' in the tree.
- In the right hand pane you should now see the 'Advanced' screen for your ZWave interface
- Now click on 'Create Child Device'
- You should now see the 'Add Child Device' screen and should click on the 'Pick device template' button.
- The 'Pick device template' window should now be visible.
- Click on the 'Device Template' drop down and select 'Light Switch (on/off)' from the list. You should now see the number '37' appear to the right of the drop down list (this is the templates ID).
- Now click on 'Pick Device Template'
- A new 'Light Switch (on/off)' device will now be added to the end of the list of child devices under your ZWave interface in the devices tree.
- If your adding a right hand paddle for a Dimmer:
- Click on 'Show Devices Tree' (at the bottom of the left hand frame) and click on the 'ZWave' item under the 'Core' in the tree.
- In the right hand pane you should now see the 'Advanced' screen for your ZWave interface
- Now click on 'Create Child Device'
- You should now see the 'Add Child Device' screen and should click on the 'Pick device template' button.
- The 'Pick device template' window should now be visible.
- Click on the 'Device Template' drop down and select 'Light Switch (Dimmable)' from the list. You should now see the number '38' appear to the right of the drop down list (this is the templates ID).
- Now click on 'Pick Device Template'
- A new 'Light Switch (on/off)' device will now be added to the end of the list of child devices under your ZWave interface in the devices tree.
- If your adding a right hand paddle for a Light Switch:
- You should now have a new Light Switch or Dimmer device in your devices tree - click on its entry in the tree.
- In the right hand pane you will now see the Advanced info for your new device - we need to modify some values for this new device;
- Modify the 'Description' field so that it describes clearly what this device is ie something like 'Master Bed Dimmer (paddle-2)' (this text is displayed in the Devices Tree)
- Now select a 'Room' from the Room drop down and tick any Entertainment Areas this Light should be added too.
- Next scroll down to the 'Device Data' section at the bottom of the screen and choose a floor Plan icon from the 'PK_FloorplanObjectType' drop down (this determines what icon will be displayed in the lighting floor plan for this specific light).
- Finally you need to set the 'Port/Channel Number' field to link this device with light switch/dimmer it is assigned to. Add the Node ID you made a note of in Step 1 to the field followed by a '/' and a number. If this is paddle-2 then the number after the '/' would be '2'. So if the Node ID was '16' you should now have the string '16/2' in the field. If you multi-paddle light/dimmer has more than two paddles then increment the value by '1' for each additional paddle.
- The final step is to click 'Save' to save the changes you have made to the device.
- Now go to the Wizards->Devices->Lights page and test your new light switch/dimmer paddle - use the 'ON', 'OFF' & '50%' buttons.
Alternate setup of Tricklestar Remote (not recommended)
Manual setup / Download configuration
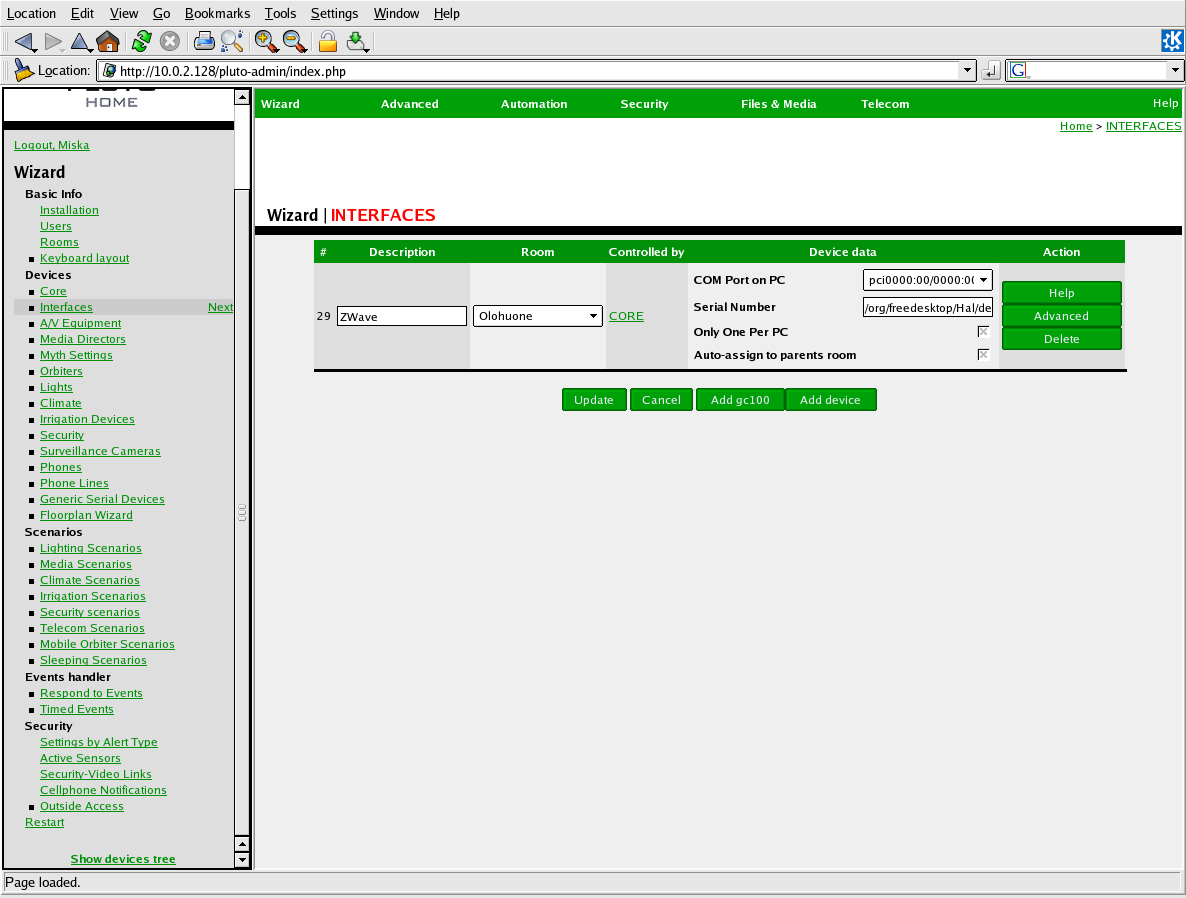
Once you have successfully installed the ZWave USB controller and it is seen on LinuxMCE (media:zwave_homepro_interface.png), you can proceed by populating the ZWave network information to LinuxMCE.
- Add your ZWave devices to your master ZWave master remote controller (like ZTH200)
- Once the devices are added to remote and verified they are working (you can control them with your remote controller), you need to copy the ZWave network information to LinuxMCE.
- Go to LinuxMCE admin page ("http://dcerouter/lmce-admin/"), then choose "Wizard -> Devices -> Interfaces -> [your ZWave controller] -> Advanced".
- On the device page select "Send command to device".
- Select command "Download Configuration" and choose "Send Message".
- Leave the data and file fields as blank
- Now LinuxMCE is waiting for the ZWave information and you should send a copy of the ZWave network with your master remote controller to LinuxMCE.
- If you are using HomePro remote controller this is done by selecting: "Setup -> Copy Remote Ctrl. -> Send Information -> Identical Copy". Once you have done that, the remote will show "Sending information..." and after successful sending it will return to clock screen (this shouldn't take more than couple of minutes).
- You can monitor the process by watching the Zwave log file on LinuxMCE (usually "/var/log/pluto/*ZWave.log"). Unfortunately the admin page doesn't give much information of what is being done and is everything going smoothly. If the process is successfully, you should see the LinuxMCE communicating with the USB controller
- Make sure the sending remote controller is near enough the USB receiver, otherwise nothing will happen.
- Go to device tree (Show devices tree) and you should see (Media:zwave_devices_tree.png) the newly added ZWave modules/devices on the tree under "CORE -> ZWave".
You should do quick reload (Wizard -> Restart -> Quick Reload Router) in order to use the newly added devices with LinuxMCE. Once you have done that you should be able to control (like switching on/off) the devices under the Light (Media:zwave_lights.png).
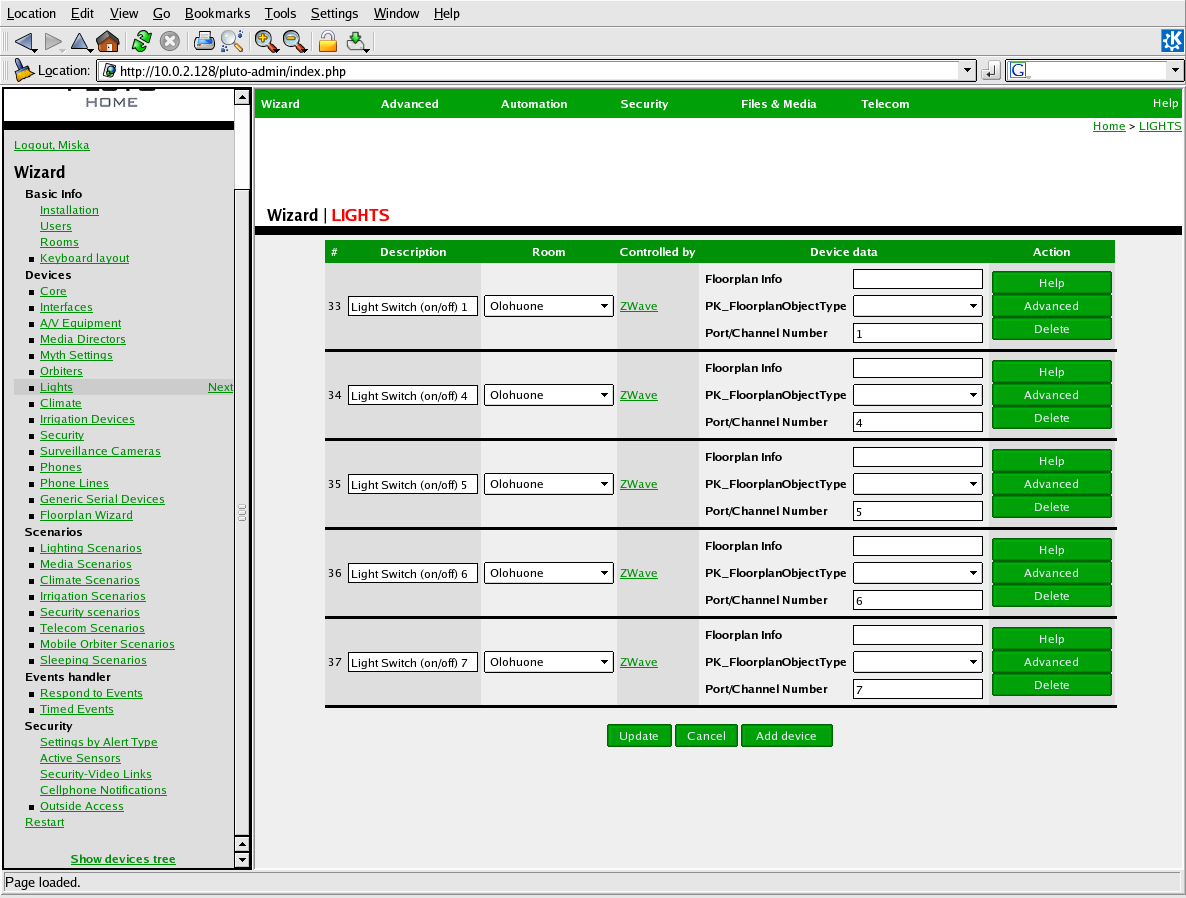
Setting associations
If you use SIS mode, associations will be set automatically, so that LMCE is always associated with each new device. This allows LMCE to receive messages when a device changes state.
The web interface allows you to create associations between devices (I believe this requires SIS mode, not sure). Click "Show device tree" then navigate to your z-wave controller (under CORE) and select "Send command to device". A popup window will show and you can choose the "Set Association" command. Enter three parameters:
- the zwave NodeID of the source device, the one that will send the command
- the group in the source device that will trigger the send (typically the button number on a multi-paddle switch)
- the NodeID(s) device(s)
Example: 5 / 2 / 7,8 would cause devices 7 and 8 to turn on when you press button 2 of device 5
Tweak advanced ZWave settings
If you want to tweak some specific settings of your ZWave devices then read this article.
Update node information
You can request a manual update of the node information (command classes). To do this open the advanced page of the main ZWave device and send command to device. Send a "Resync node" command with the node id of the node you want to update the information from.
It should normally not be necessary to do this, as the node information is updated at the first reload after it was added. However, it can be useful if for some reason the node information was not correctly set or if you have replaced a node which may have other command classes.
Implementation
OpenZWave version
This in included in 1204 and onwards. The source code is available in LinuxMCE's SVN repository: http://svn.linuxmce.org/svn/branches/LinuxMCE-0810/src/ZWave-OZW.
Open version
The new open Z-Wave driver is included in the 0810 and 1004 release. The source code is available in LinuxMCE's SVN repository: http://svn.linuxmce.org/svn/branches/LinuxMCE-0810/src/ZWave.
To know
If after a new install you have problems with your current zwave network, it may be useful to make a complete reset of this network and complete it with a reset of all the devices. The reset of devices can be done with an exclusion command (find those in your devices books).