Difference between revisions of "RoamingOrb"
m (picture placement) |
|||
| (9 intermediate revisions by 2 users not shown) | |||
| Line 1: | Line 1: | ||
[[Category:Orbiters]] | [[Category:Orbiters]] | ||
| − | [[Image:logo.jpg| | + | [[Image:splash.png|left]] |
| − | {{versioninfo|810Status=works|810UpdatedDate=5th October 2010|810UpdatedBy=Foxi352}} | + | [[Image:logo.jpg|right]] |
| + | {{versioninfo|810Status=works|810UpdatedDate=5th October 2010|810UpdatedBy=Foxi352|versioninfo|1004Status=works|1004UpdatedDate=1st January 2011|1004UpdatedBy=Foxi352}} | ||
| + | |||
| + | <br /><br /> | ||
== About == | == About == | ||
| + | [[Image:orbiter.png|left]] | ||
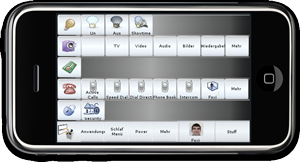
RoamingOrb is a touch orbiter port for iOS using the lightweight touch orbiter concept based on the proxy orbiter plugin. It uses the same techniques as WebOrbiter 2.0. | RoamingOrb is a touch orbiter port for iOS using the lightweight touch orbiter concept based on the proxy orbiter plugin. It uses the same techniques as WebOrbiter 2.0. | ||
The app is available through the official Apple app store. | The app is available through the official Apple app store. | ||
| + | <br /><br /><br /><br /><br /><br /> | ||
== Installation == | == Installation == | ||
Installation is done the same way as any other app. | Installation is done the same way as any other app. | ||
| Line 14: | Line 19: | ||
== Configuration == | == Configuration == | ||
[[Image:preferences.jpg|left]][[Image:settings.jpg]] | [[Image:preferences.jpg|left]][[Image:settings.jpg]] | ||
| − | <br /> | + | <br />Firstly, make sure that you have generated a [[Web Orbiter 2.0]] in WebAdmin. Some users have reported more success with the Basic skin and iPhone resolution than any other skin or resolution. |
| + | RoamingOrb requires two values to be defined before it can be used. To input these values, use the Settings app on your iOS device and go to the subsection titled "Roaming Orb" There are several different versions of these values. | ||
| + | If you would like to use the Orbiter over 3G, then you must enter the public IP address of your CORE (the one assigned to you by your ISP) and open the orbiter's listening port on any firewalls between it and the core (this includes the core's) | ||
| + | If you would just like to connect through your local network, input the cores local IP (usually 192.168.80.1) and the listening port defined by your Web Orbiter. | ||
== Intent == | == Intent == | ||
Please note, this is not a full Orbiter with media playback capabilities. It only has the same remote control features as the WebOrbiter 2.0. | Please note, this is not a full Orbiter with media playback capabilities. It only has the same remote control features as the WebOrbiter 2.0. | ||
Latest revision as of 12:49, 30 August 2011
| Version | Status | Date Updated | Updated By |
|---|---|---|---|
| 710 | Unknown | N/A | N/A |
| 810 | works | 5th October 2010 | Foxi352 |
| 1004 | works | 1st January 2011 | Foxi352 |
| 1204 | Unknown | N/A | N/A |
| 1404 | Unknown | N/A | N/A |
| Usage Information | |||
Contents
About
RoamingOrb is a touch orbiter port for iOS using the lightweight touch orbiter concept based on the proxy orbiter plugin. It uses the same techniques as WebOrbiter 2.0. The app is available through the official Apple app store.
Installation
Installation is done the same way as any other app.
- Connect to the app store
- Search for the app "RoamingOrb"
- On the description page click on "Free" to install it
Configuration

Firstly, make sure that you have generated a Web Orbiter 2.0 in WebAdmin. Some users have reported more success with the Basic skin and iPhone resolution than any other skin or resolution.
RoamingOrb requires two values to be defined before it can be used. To input these values, use the Settings app on your iOS device and go to the subsection titled "Roaming Orb" There are several different versions of these values.
If you would like to use the Orbiter over 3G, then you must enter the public IP address of your CORE (the one assigned to you by your ISP) and open the orbiter's listening port on any firewalls between it and the core (this includes the core's)
If you would just like to connect through your local network, input the cores local IP (usually 192.168.80.1) and the listening port defined by your Web Orbiter.
Intent
Please note, this is not a full Orbiter with media playback capabilities. It only has the same remote control features as the WebOrbiter 2.0.


