Difference between revisions of "EP-636 SIP Phone"
| Line 2: | Line 2: | ||
| __TOC__ | | __TOC__ | ||
|} | |} | ||
| − | + | = Summary = | |
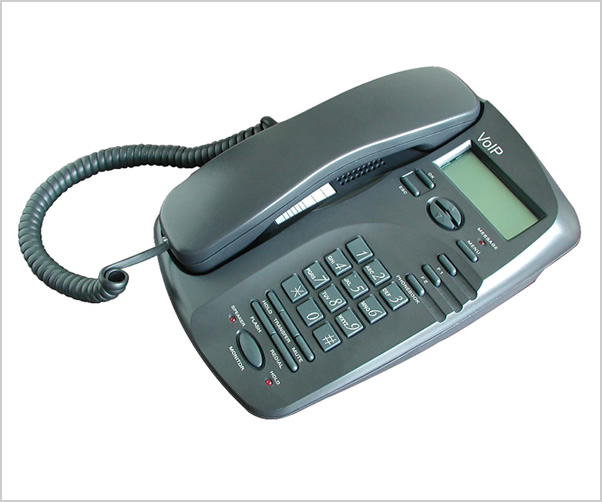
[[Image:Big_636.jpg]] | [[Image:Big_636.jpg]] | ||
| Line 67: | Line 67: | ||
1. The phone would lose connection after a period of time, this time could vary from 5mins to 5hours | 1. The phone would lose connection after a period of time, this time could vary from 5mins to 5hours | ||
| + | |||
2. When there was an incoming call all the orbiters rang but the phone did not. | 2. When there was an incoming call all the orbiters rang but the phone did not. | ||
These problems were fixed with the following steps: | These problems were fixed with the following steps: | ||
| − | + | == Connection Loss == | |
* In LMCE Webadmin, select '''Wizard''' > '''Devices''' > '''Phones''' from the menu up top. | * In LMCE Webadmin, select '''Wizard''' > '''Devices''' > '''Phones''' from the menu up top. | ||
| Line 85: | Line 86: | ||
* Reload Router | * Reload Router | ||
| − | + | == Phone not ringing == | |
| + | |||
| + | * In LMCE Webadmin, Access the FreePBX page by selecting '''Wizard''' > '''Devices''' > '''Phone Lines''' from the menu up top. Hit the '''Deactivate Automatic Settings''', (yes, you are sure). Now Click the link to configure AMP. | ||
| + | |||
| + | * Under '''Inbound Call Control''', Click on '''Ring Groups'''. | ||
| + | |||
| + | * Add a ring group, fill in a description, and in the '''Extention List''' box put in the extension numbers you want to be called (including your new phone). | ||
| + | |||
| + | * Click '''Submit''' at the bottom | ||
| + | |||
| + | * Under '''Inbound Call Control''', Click on '''Inbound Routes'''. | ||
| + | |||
| + | * select the Inbound route you already have set up and then at the bottom, in the '''set destination''' section check the '''ring groups''' box and select your newly created ring group | ||
| + | |||
| + | * Click '''Submit''' at the bottom | ||
| + | |||
| + | * Click on '''Apply Configuration changes''' now you are all set | ||
Revision as of 23:07, 29 May 2009
Summary
EP-636 is an economic IP phone that could running under H.323 v4 and SIP v2. It possesses single file of English letters and single file of digital LCD displayer and achieving full dulplex hands-free call. it is disposed into H.323, EP-636 can cooperate with GK and GW of most H.323. It also has perfect H.450 protocol to complete all telecom value-added services such as call transfer, call forward, call waiting, etc.. Cooperating with soft exchange system, it can totally replace traditional PBX or KEY LINE PHONE. It can also be used as LAN phone or hot-line phone. When it is disposed into SIP, EP-636 can cooperate with most SIP system. Besides having popular g.723 and g.729, it can use low-priced GSM voice compression algorithms.
Setting it up
Hardware Setup
- Assemble the phone if not assembled.
- Plug the phone into a network switch using CAT5 cable.
- Plug the power supply into the wall and then into the back of the phone.
LMCE Setup
- First, be sure to log into your web front end, with a user who can change configuration.
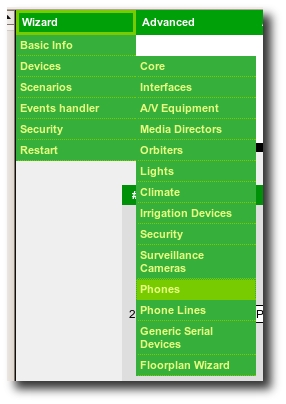
- Once this is done, select Wizard > Devices > Phones from the menu up top.
- If you have other phones already configured, you will see a list of them. Otherwise, this page will be blank.
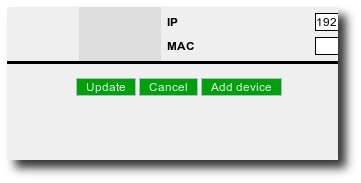
Click Add Device.
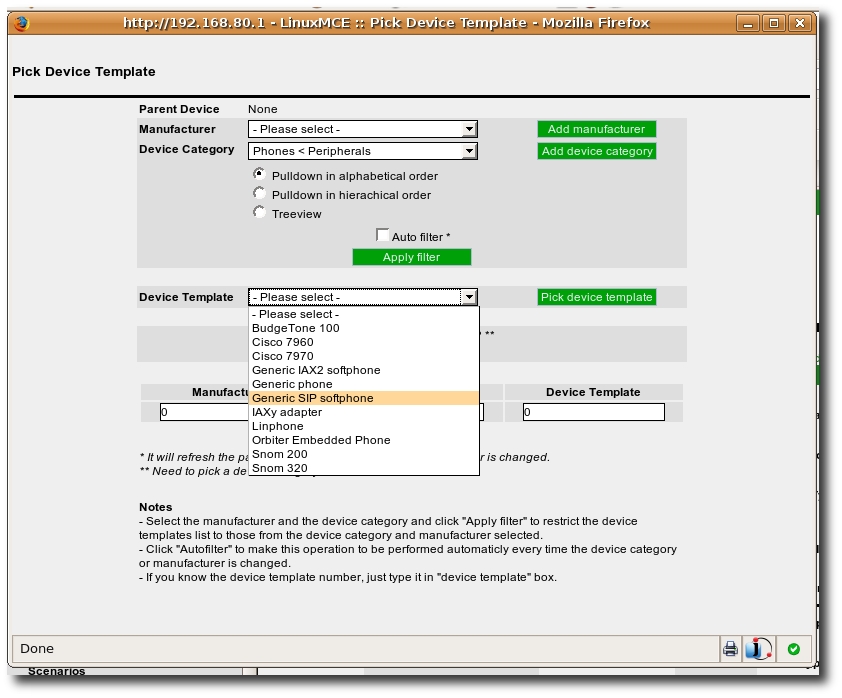
An Add Device window will appear.
- Select Generic SIP Softphone from the Device Template drop-down menu, and press the Pick Device Template button.
The Add Device window will disappear, and the new phone will appear.
- In the list. Change the name of the phone to something more descriptive. Make note of the Phone Number and IP Address, and set the FloorPlan Object to Non-LinuxMCE Phone to provide a floor plan icon.
- type in the Mac Address, mine was written on the box. if you can't find it skip this.
LinuxMCE now knows about the phone, and has configured an extension for it in Asterisk, with the (Ext) Phone Number that was specified.
Phone Configuration Setup
- In a web page window type in the IP address of the phone to access the configuration portal. Login as Admin, default user name is 'admin' password is 'admin'
- Follow the instructions in the pictures below:
- Click on 'OK' at the bottom of the page.
- Hit the 'Save Configuration' Tab at the side.
Power Cycle
- Reset your core and reboot the phone.
Possible Extra Configurations
I found 2 problems when I had finished:
1. The phone would lose connection after a period of time, this time could vary from 5mins to 5hours
2. When there was an incoming call all the orbiters rang but the phone did not.
These problems were fixed with the following steps:
Connection Loss
- In LMCE Webadmin, select Wizard > Devices > Phones from the menu up top.
- Click on the Advanced button on the new phone
- In the top section check the box Use 5 second pings to ensure connection stays alive.
- Hit Save
- Reload Router
Phone not ringing
- In LMCE Webadmin, Access the FreePBX page by selecting Wizard > Devices > Phone Lines from the menu up top. Hit the Deactivate Automatic Settings, (yes, you are sure). Now Click the link to configure AMP.
- Under Inbound Call Control, Click on Ring Groups.
- Add a ring group, fill in a description, and in the Extention List box put in the extension numbers you want to be called (including your new phone).
- Click Submit at the bottom
- Under Inbound Call Control, Click on Inbound Routes.
- select the Inbound route you already have set up and then at the bottom, in the set destination section check the ring groups box and select your newly created ring group
- Click Submit at the bottom
- Click on Apply Configuration changes now you are all set


