Installation Guide
Still needs to be updated for LinuxMCE 0704
Steps for installing Linux MCE on an Ubuntu 7.04 system :
1. Take an Ubuntu install already configured with Internet connection (Configure your network card and DNS). If you don't have an Ubuntu system already installed please follow these generic steps:
- Take an Ubuntu Live Cd and boot from it.
- Choose 'Start or install Ubuntu'
- When Ubuntu's desktop appears, double-click on 'Install'
- A short wizard will start and guide you; Select the language and press 'forward'
- Choose your timezone and press 'forward'
- Select the keyboard layout
- Choose desktop name, a user name and a password
- Select the partitioning options for your disk: erase the entire disk or just manually edit the options.
- Ready to install.
- Reboot the system and remove the Live CD
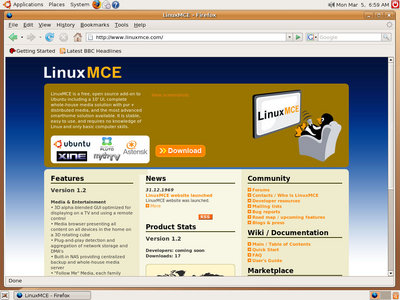
2. From within the Ubuntu 7.04 desktop, open Firefox (the orange and blue icon at the top), and go to www.linuxmce.com and select 'Download Instructions' to download the Linux MCE CD`s or the DVD on your machine. Or just use this direct link click here
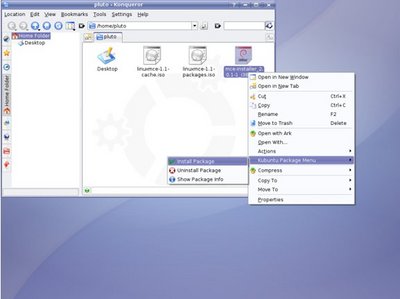
3. Once you have downloaded the packages, proceed with the installation. First, you have to install mce-installer, which is the software that will guide you through the installation. Right-click on it, go to Kubuntu Package Menu -> Install Package.
4. The installer will have put an "Install Linux MCE" icon on your desktop. Double-click it to start the installation process. A window will appear saying that you will be notified when updates are available.
After this you have to choose if you want a dedicated core or a hybrid (click hereto find out the difference between a core and a hybrid), and then click on "Forward" button.
5. *Only for Nvidia cards - LinuxMCE will detect that you are using a nVidia Card, but you are not using the proprietary video driver. Only that driver works well with LinuxMCE and nvidia cards and it will ask you it you want to switch to it now.
6. The next screen will ask you want to keep your current network configuration or if you want to set your network options manually; then press "Forward".

And then you must set your network using static IP or DHCP
7. You have to choose a mirror
8. In the next step you have 2 options :
- First it asks you if you want to Run a DHCP Server or not. LinuxMCE must be the DHCP server for your home in order to provide plug-and-play detection of network devices like IP Cameras and VOIP phones, and to provide network boot images to any other pc's in the home you want to use as media stations.
- The other option asks if you want to keep the default Internal Network address or if you want to change it. If you have already a DHCP-Server running, choose also this option. You can then switch from 'manually' to 'DHCP'.
After that you must press 'Forward'.
9. In the next window you need to choose what interface you want to use and you have to pick one of three possibilities.
10. On the next step you have to choose if you want to install lame and libdvdcss and if it is legal in your country to use them.
11. You have to select how do you plan to use your computer: Primarily used as a PC- you can start LMCE manually when you need it or A dedicated LinuxMCE and you can start ubuntu when you need it.
12. This step is very important you have to insert
LinuxMCE DISC 1
LinuxMCE DISC 2
Kubuntu 7.04 Live CD
can see message about the Linux MCE system installation. Don't worry if the system seems to stop at points or report what seems like error messages. This is normal since at places it will be testing drivers out, and is only there for the advanced Linux user. You will get a dialog box if something really does go wrong. And, understand this may take a very long time since it will in parallel be updating your Ubuntu system to the latest version. Just leave it for an hour or two and come back later.
9. In the final step you will see a message saying "Installation was finished , please reboot"
- (Optional) Ubuntu and Linux MCE won't install by default software needed to play DVD or some other restricted media formats that might be illegal in some countries. You can follow the Restricted Software Installation Guide if the restrictions don't apply to your country.
Next reboot by choosing System, Quit, Restart from Ubuntu's desktop. Note: The first time you start LinuxMCE it will take quite a while, like around 10 minute, because it will re-validate everything was installed ok. After this it starts up pretty quickly, in less than 60 seconds.
Next follow the Quick Start Guide to tell LinuxMCE about how you want to use it.
Note that if you said you want LinuxMCE to startup by default, after rebooting you'll have LinuxMCE, not Ubuntu. If you will only use this as a media pc, that's fine; you won't ever need to access the Ubuntu desktop to set anything up and can do it all from either the LMCE UI and a remote control, or with the LMCE web admin panel using the web browser of any pc in your home. But, if you want to use this as a normal Ubuntu PC too, and you want to start Ubuntu after LinuxMCE is going, there's not yet an icon to switch to Ubuntu from within LinuxMCE, so press Ctrl+Alt+F2, login, and type StartX. If you said you want Ubuntu by default, it will boot to the Ubuntu desktop and you can choose Applications, Sound & Video, Start Media Center to start LinuxMCE manually. When both LinuxMCE and Ubuntu are running, you can toggle between them by pressing ctrl+alt+f7 for Ubuntu and ctrl+alt+F11 for LinuxMCE. Unfortunately, at this moment, once you start LinuxMCE there is no way to stop it. The Ubuntu integration is still a work in progress.


